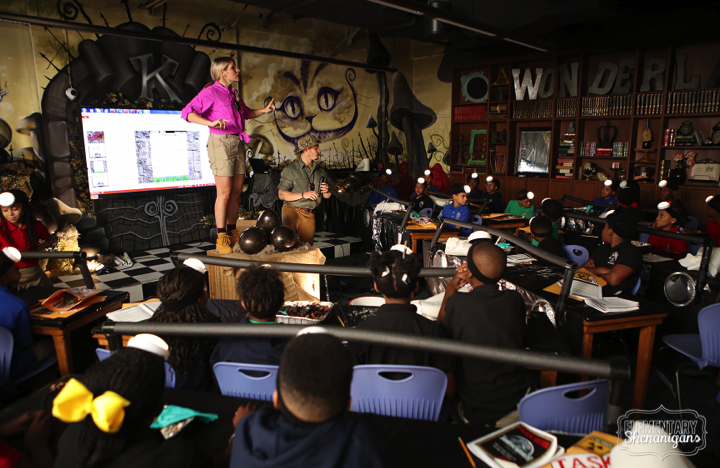
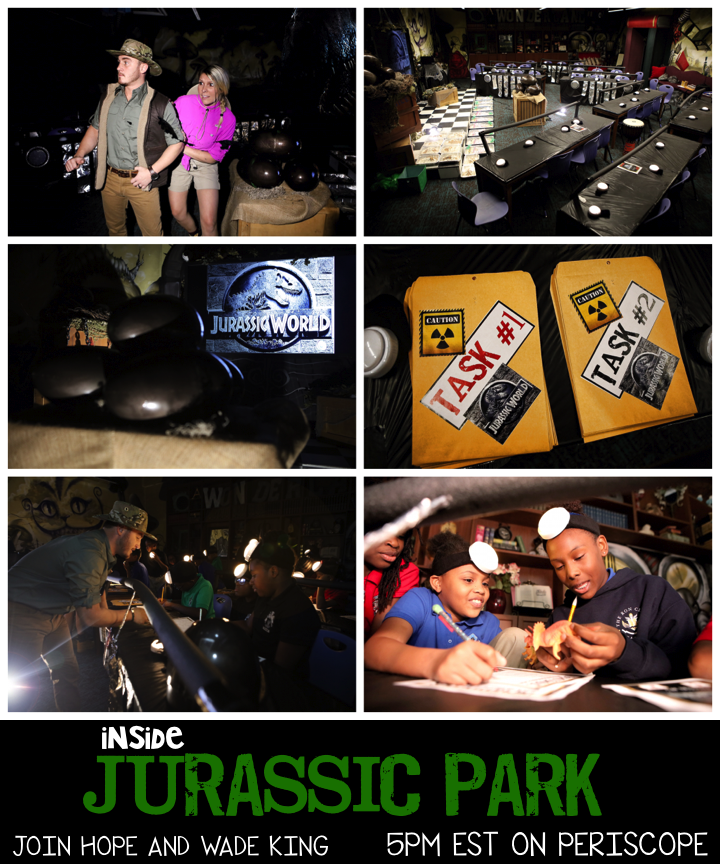
Okay! So it's no secret that I love finding new ways to completely blow my students' minds. Plus, Wade and I totally fell in love with the new dino sensation, Jurassic World, and knew this would make the perfect setting for a super fun lesson. We just had to wait for the right content.
So I give you...Jurassic World! A lesson where the students' abilities were tested and challenged to see if their knowledge could help them escape the park. They had a ticket to enter, but only their knowledge of new content could get them out. They learned all about animal classifications, adaptations, life cycles, food webs and food chains, while working their way through the scientific method, dodging park disasters by solving math problems, and using close reading and comprehension strategies to infer, predict, and draw conclusions about the Jurassic Era. I am happy to report that all 38 students did manage to escape the park...and only seconds before feeding time.
Check out our latest Periscope video to see how all of the magic {and tons of learning} went down:
Here is a closer look at some lesson specifics:
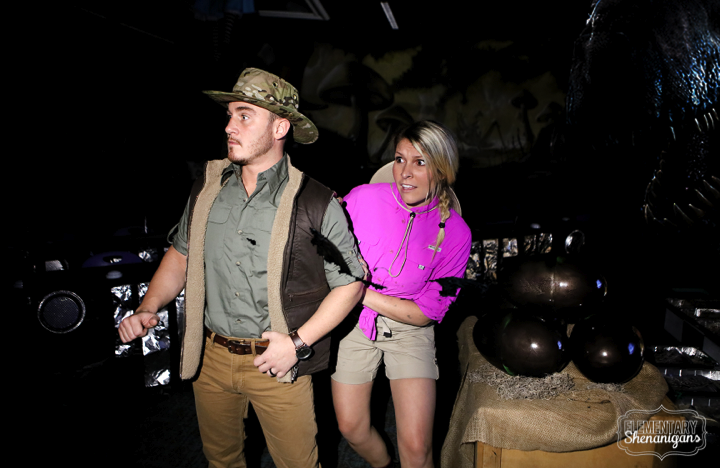
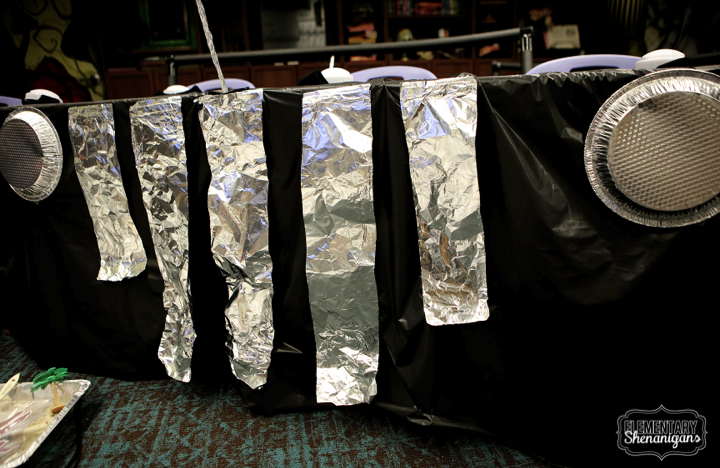
As each student entered the room, they were loaded into a park jeep.
These jeeps were created out of black plastic (you could also use trash bags), insulation pipes ($1.00 a piece at Lowe's), aluminum foil, and pie pans. Easiest thing I've done in a while! Plus they totally scream Jurassic World!
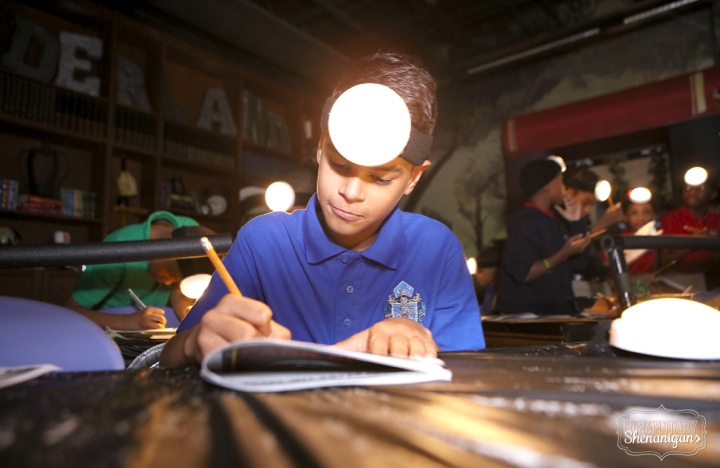
The students were instructed to keep all hands and valuable body parts in the jeep at all times. ;) Once they were buckled in, they immediately put their headlamps to use.
Making the headlamps was another super easy task. I simply put a piece of clear tape over the batteries, added a dab of hot glue to a black sweatband, and secured the push light. I found these lights at Walmart super cheap.
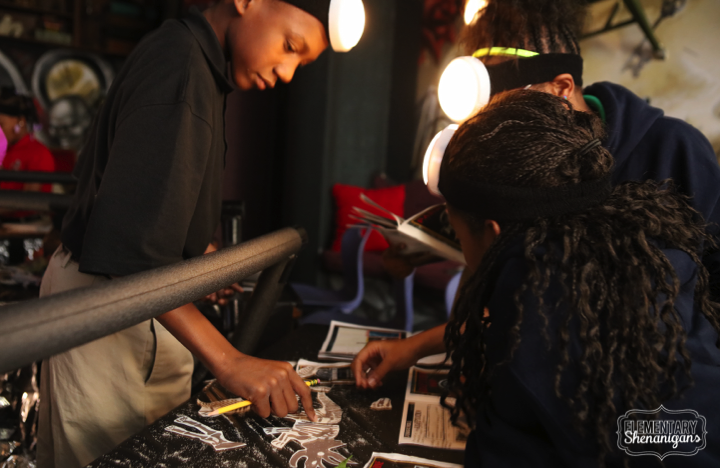
Now, let's talk content. Before the students entered the gates of the park, they had to complete a close read activity to educate themselves about the Jurassic Period. We have been working diligently on close reading skills, so the students got right to annotations, identifying key ideas, vocabulary, text structure, etc. Each student in the jeep selected a different article. After each student was an expert on his/her topic, they jigsawed to share their findings.
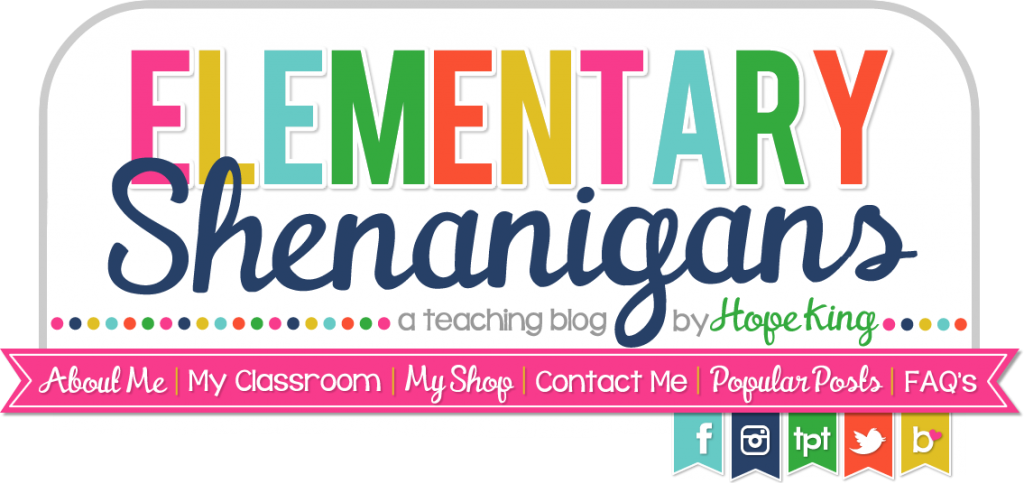
It was finally time...all students were welcomed into the park. I showed several video clips but had to heavily monitor the language! :) This made it feel extremely real as we were sitting in our jeeps. Here is the video I showed as they were welcomed into the park!
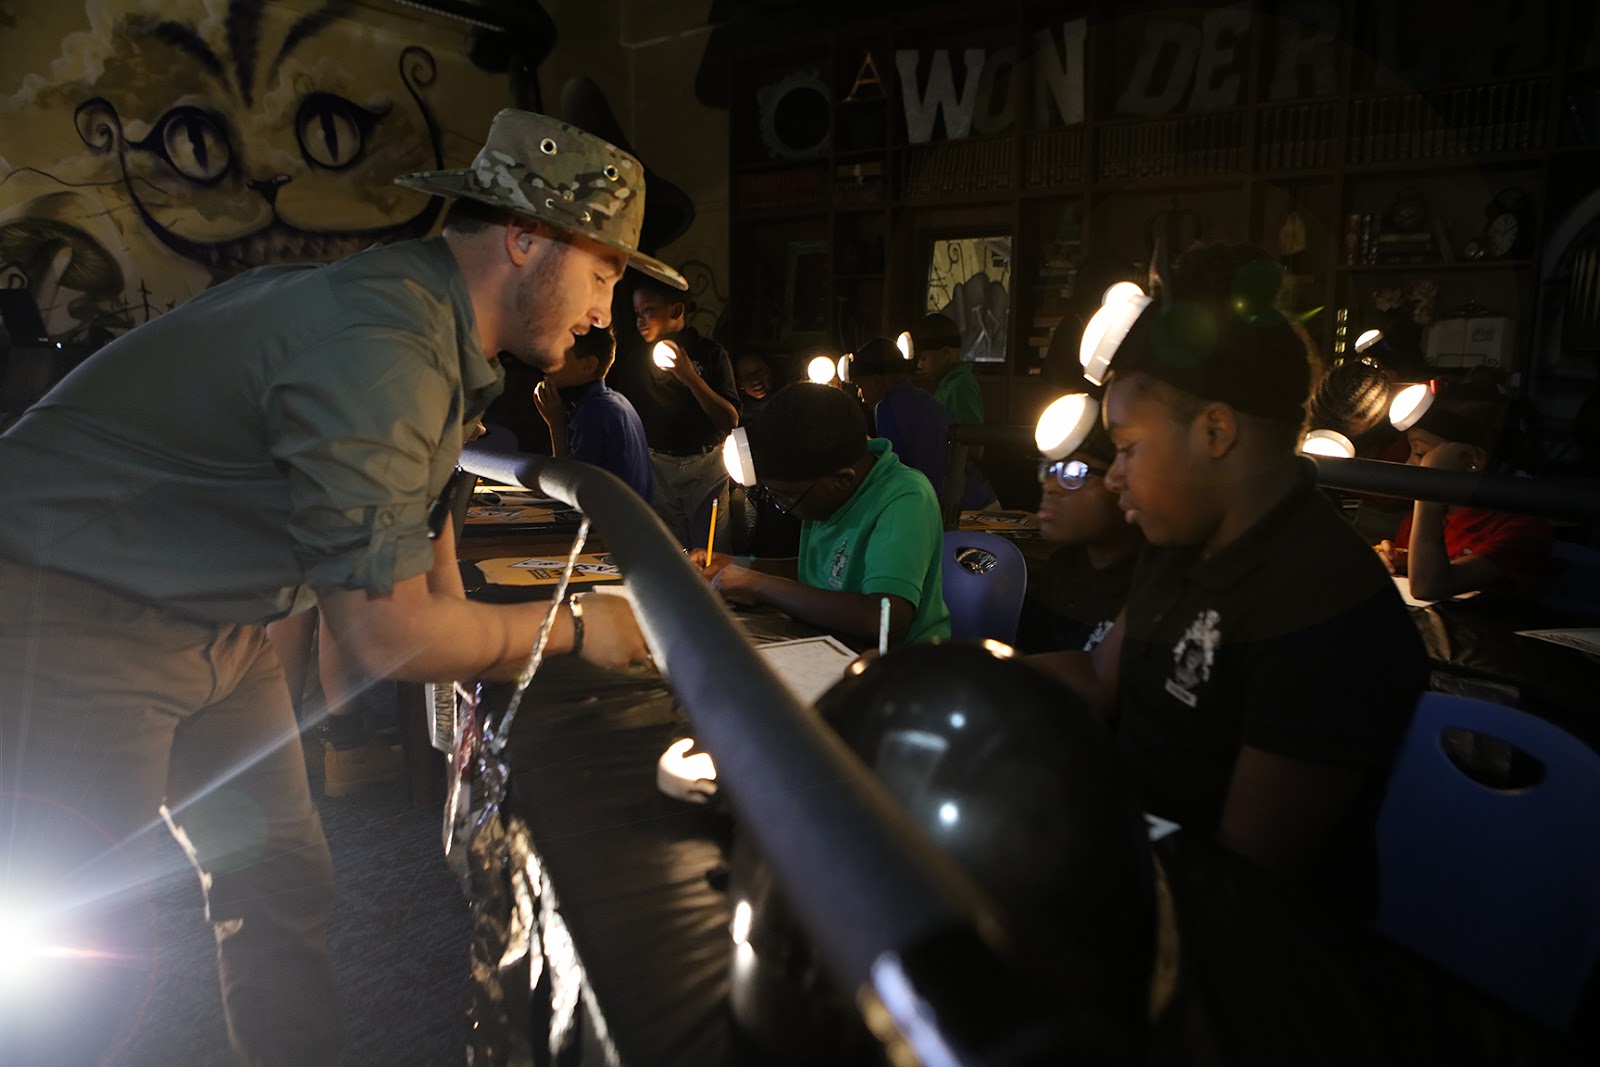
After their initial welcome, the students were instructed that they are given the challenge or completing four tasks in order to exit the park. Here is a closer look at those tasks.
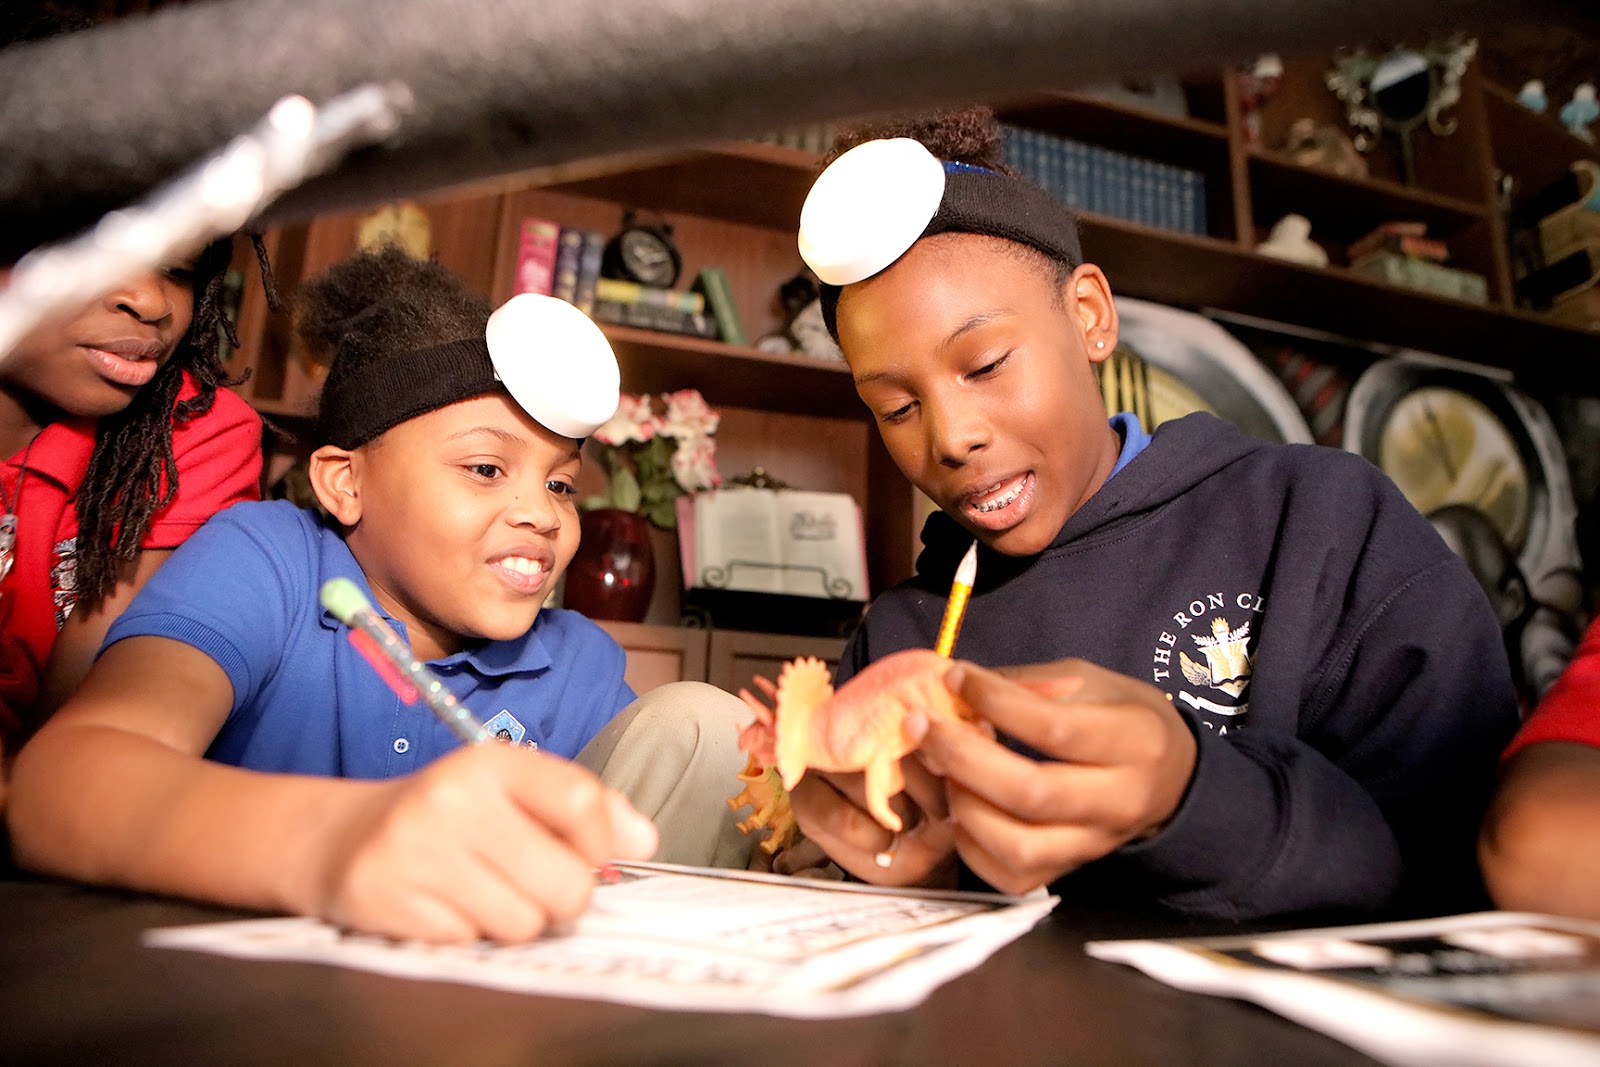
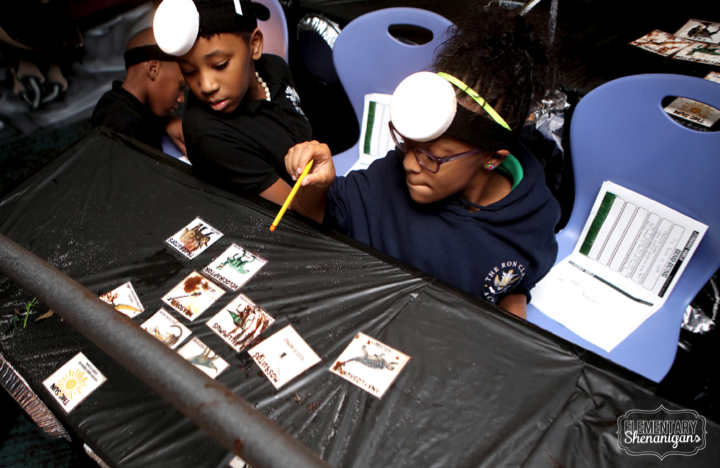
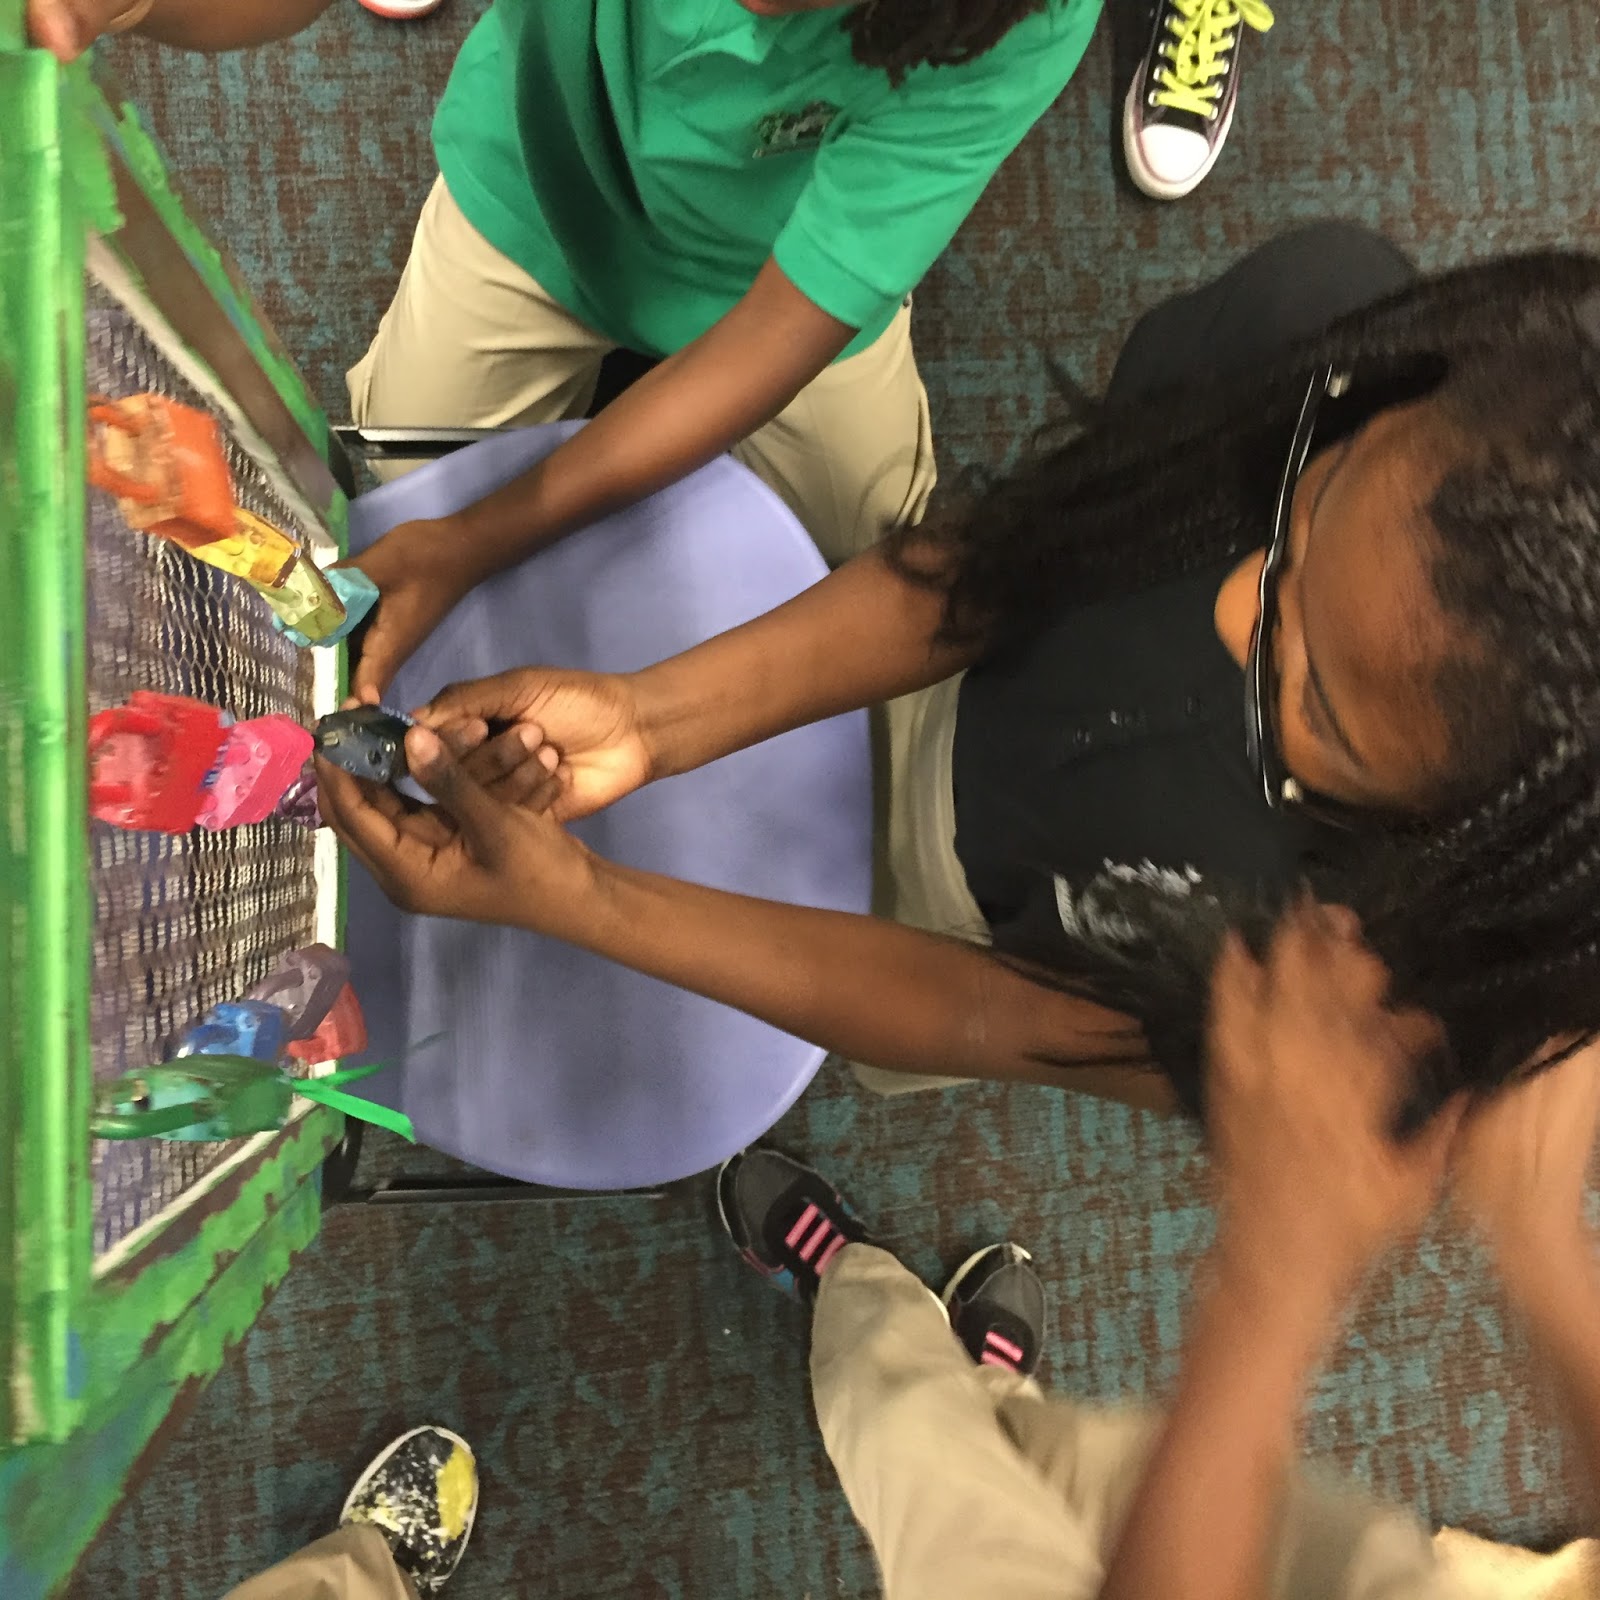
During task one, we reviewed animal classifications and talked about how specific dinosaurs would be classified. Each group was then handed a giant dino egg. Inside the egg, they found six new species of dinosaurs. They were given the task to create their own dichotomous key to name the new species.
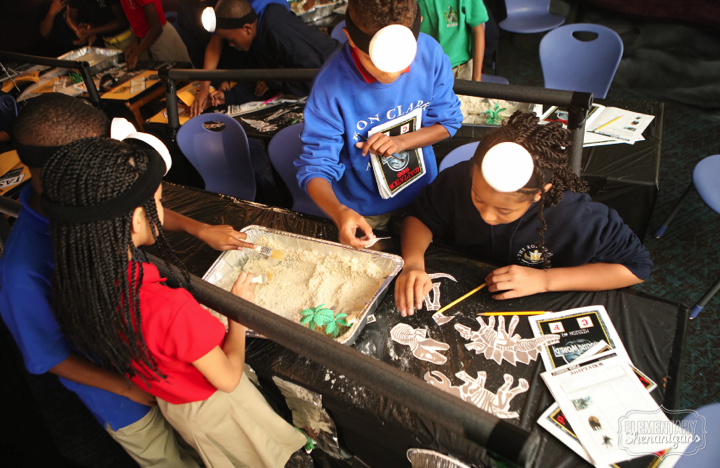
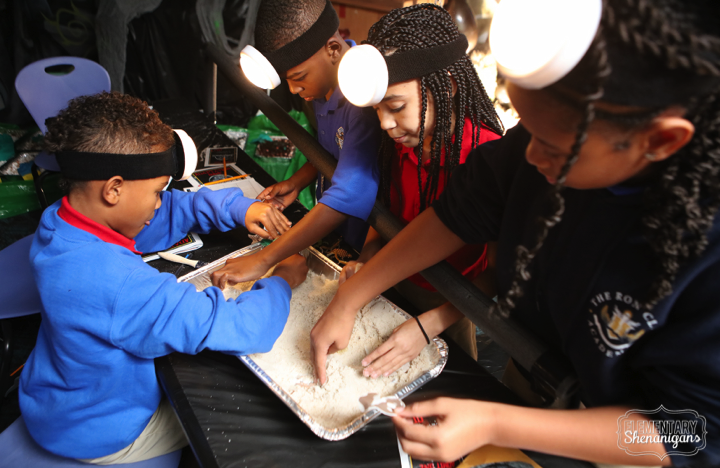
Task #2 was all about animal adaptations. We discussed the difference between physical and behavior adaptations, along with understanding the difference between instinctive and learned behaviors. We discussed the ways that scientists have learned about animals in our world and how they have been able to draw conclusions about the past. We explained how scientists must use fossils to infer adaptations about the dinos in our park since we have never actually observed a dino in real life. The kids quickly transitioned into their next role as excavator. They had to dig to find the fossils of three different dinosaurs. Then they had to piece their findings together and infer adaptations. At the conclusion of their inferences, I showed some research from real scientists. They confirmed their observations.
As we lead into task #3, I showed this quick video clip. Again...I monitored for language!
Before the students were given their task, they were first required to work their way through the scientific method to solve the issue with one of our dinos in the park.
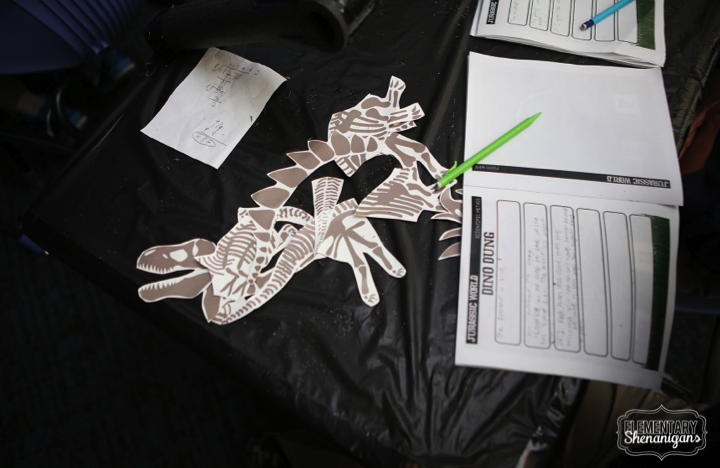
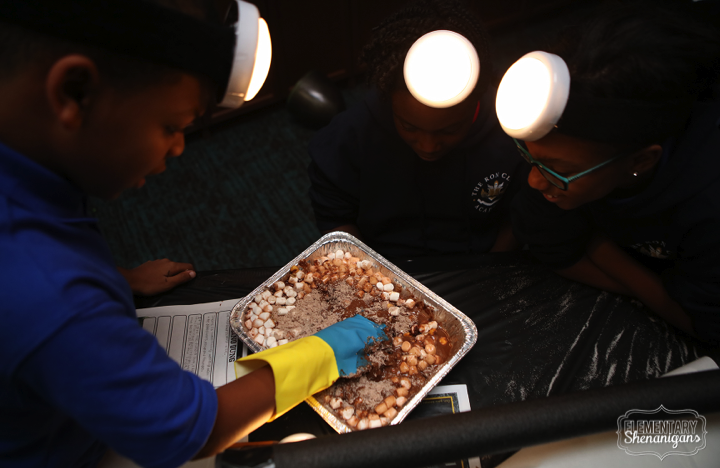
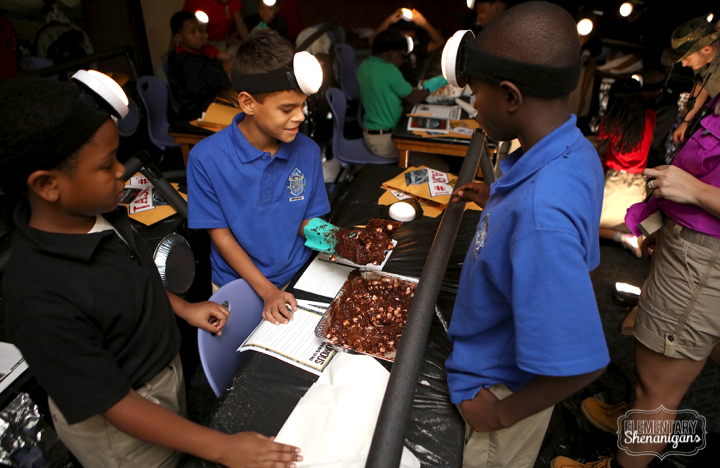
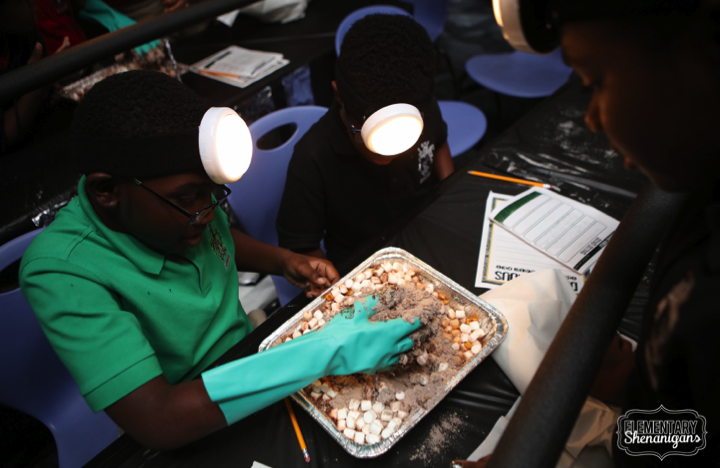
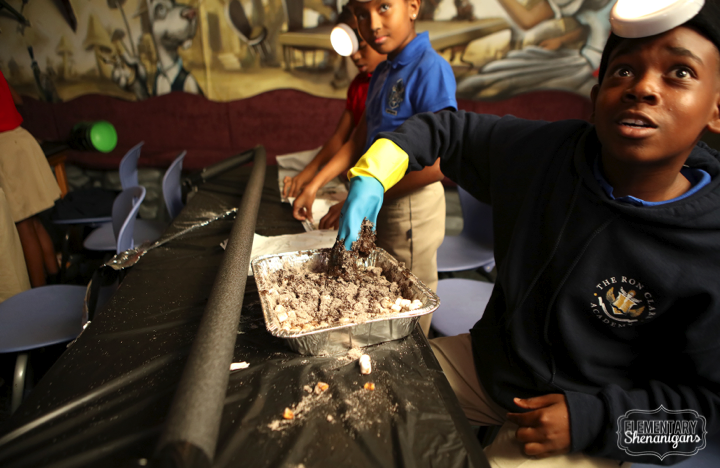
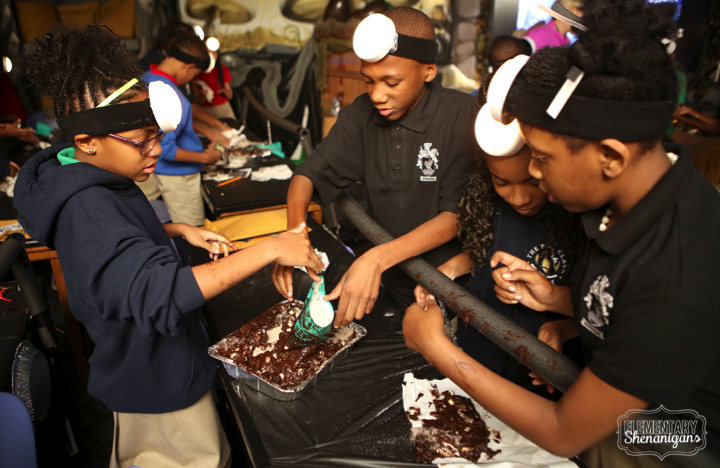
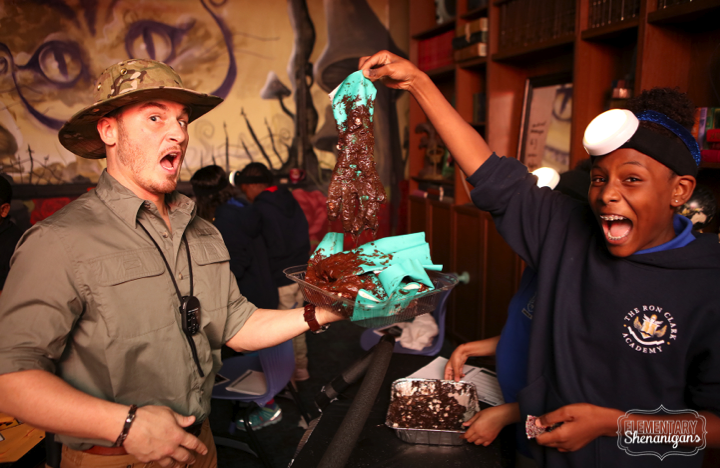
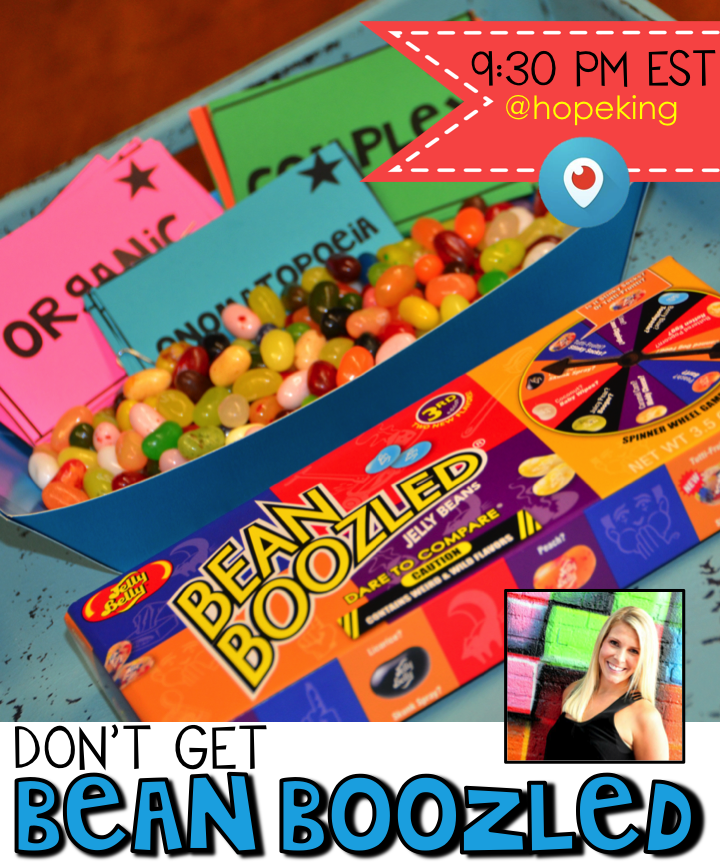
Then came task #3. My favorite! We had a lesson about energy, food chains, and food webs. I told the students that our scientists at the park, much like all scientists, find a lot of information about animals through inspecting their feces. Lucky for them, I had gone out to the field to collect samples for them to investigate. They freaked! OUT!
So what were they investigating for? Evidence of energy. Kinda like owl pellets...only dino dung! :) In the bottom, I placed 12 different cards that would create a complete food web for our park. The students had to find the cards and figure out what they created. Once they identified that it created a food web, they had to identify the produces, consumers, decomposers, and individual food chains found within.
The dino dung was simply brownie mix, water, marshmallows, and few different seeds.
And taks four? Well, their jeeps broke down right before the final exit of the park, they had to construct a scientific experiment to get their jeeps back up and running.
Note: I typically would have taught one task per day. However, I had 5th grade for four hours this day, so I was able to accomplish a great amount of content.
So how did we incorporate math? During each task, at some point, the students would hear this sound:
Immediately a math problem/park crisis would pop up on the board. They must solve the crisis by answering the math problem with the correct answer. Every student in their jeep must have solved the problem for them to resume completing the task that they were currently working on. Just to shake things up a bit.
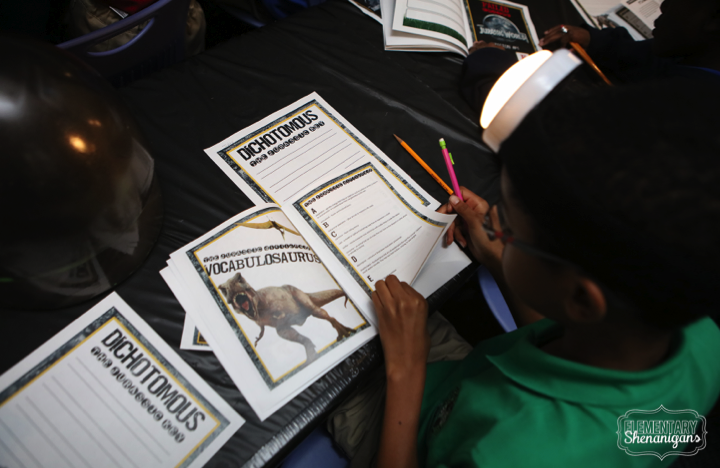
Umm...did I mention that the students learned 52 new vocabulary words within this lesson? These were all included in their "vocabulosaurus"
This was such a fun lesson. I seriously think we hit a good 25 different standards, and I was able to plow through a great amount of my life science content.
Of course we had lots of great dinosaurs sounds playing throughout the lesson. Here are a few links:
This was such a fund day. I may have had more fun than the kids. If you have any questions about this lesson, feel free to leave them in the comments below and I will do a follow up post! :)
This was one of my absolute favorite units when I taught 2nd and 3rd grade. I will be venturing into traditional literature in the next month or so with 5th and 6th and am already thinking about ways to tweak this to challenge my older students. I will definitely post how I teach tall tales, along with myths, fairy tales, and other types of traditional literature within the next few weeks. Until then, this sweet little unit will be my featured product of the week. It will be on sale all week long. You can snag it here for only $5.00! Here are some more details!
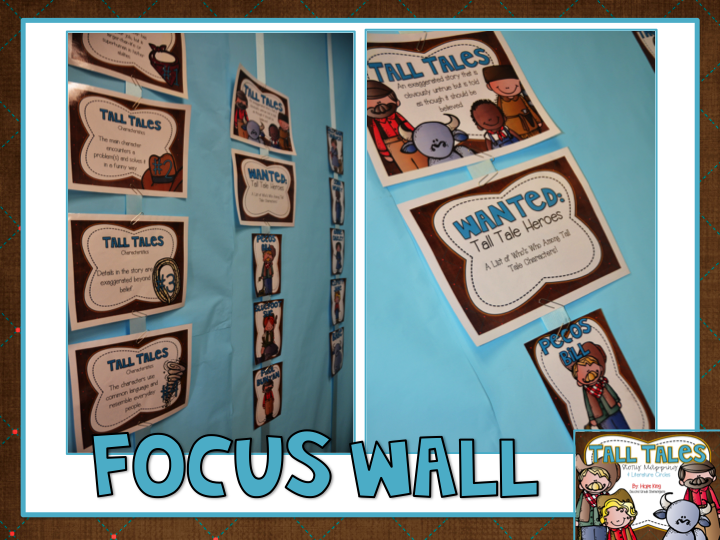
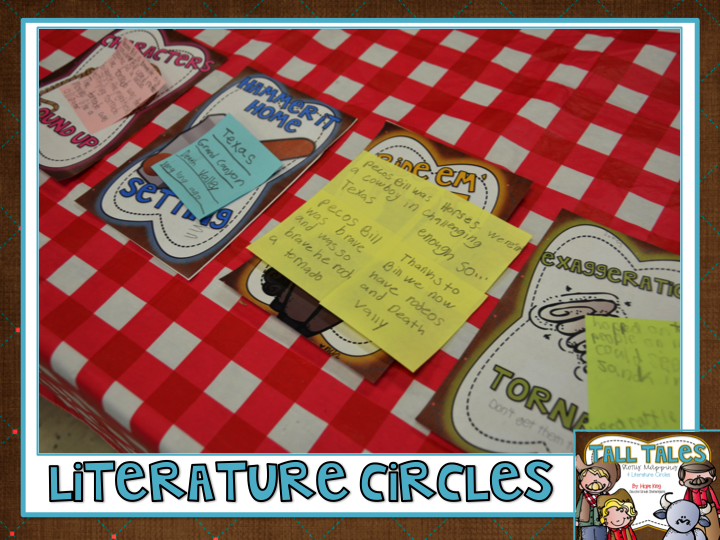
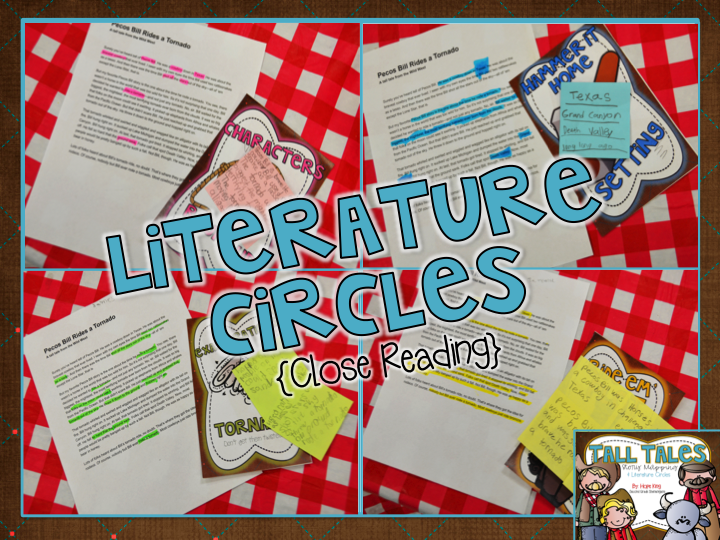
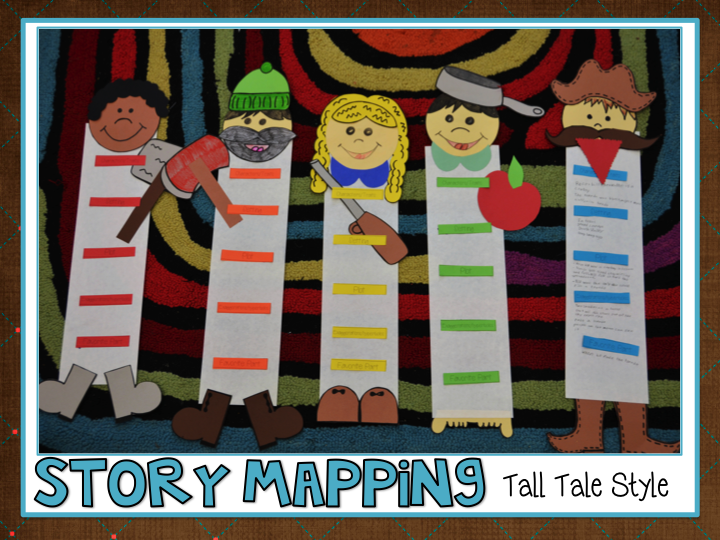
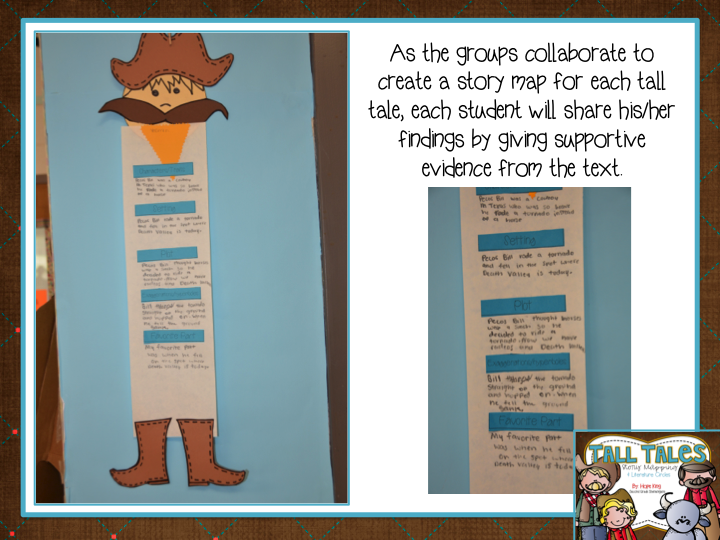
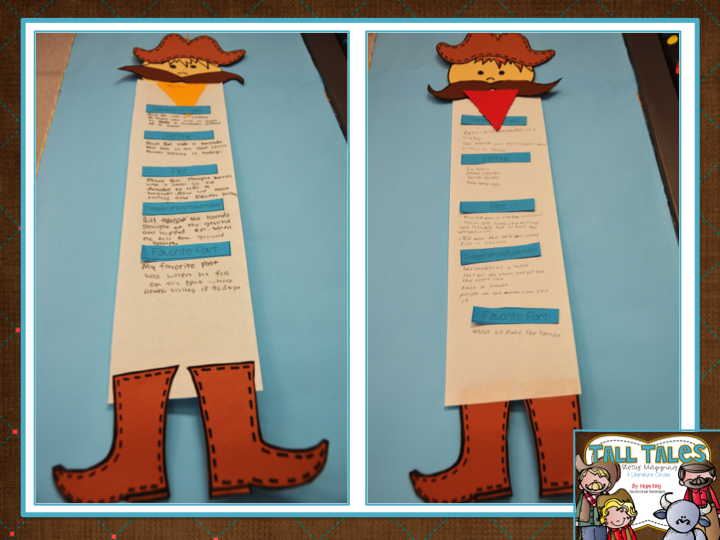
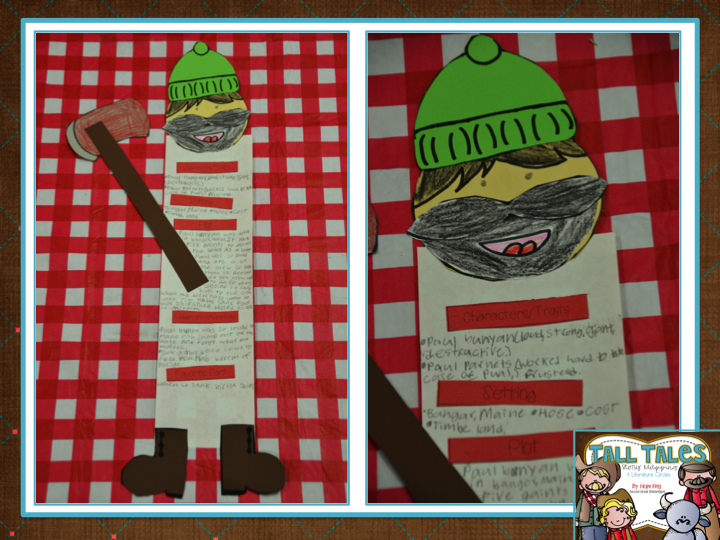
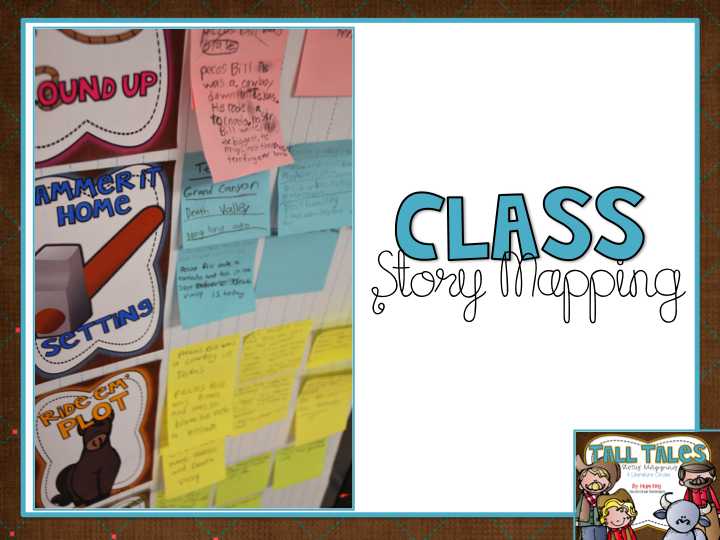
TALL TALES! I mean what kid doesn't love studying famous American Tall Tale Heroes. When I taught this unit in 2nd and 3rd grade, I loved tying in some practice with narrative elements as well. This little tall tale study happened through literature circles and story mapping.
We begin our lesson each day with a little close reading practice. During the initial reading, the students read to become familiar with the passage. Then, they were assigned a focus/purpose {one of the four elements we are working on} for their reading that they will take back to their literature circles later on. During their second reading, they highlight evidence or clues that will help them describe their element. Then, on the final reading, the students write details to support their story element.
Once the reading was completed, I allowed the students to form groups of four {one from each element} and together, they collaborated to create a story map of the tale.
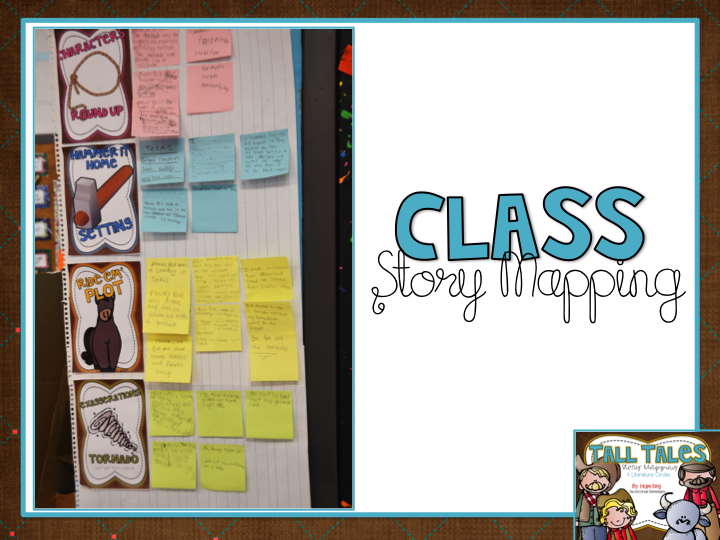
Then, we meet as a class to create a final story map where we would add details or important events that we "overlooked" during our group meeting.
This was such an engaging of tall tales. The kids not only learned about some pretty cool American Tall Tales, but they received practice in some pretty important reading skills along the way.
If you need a little extra boost to your tall tale study, you can check out my unit on TPT.
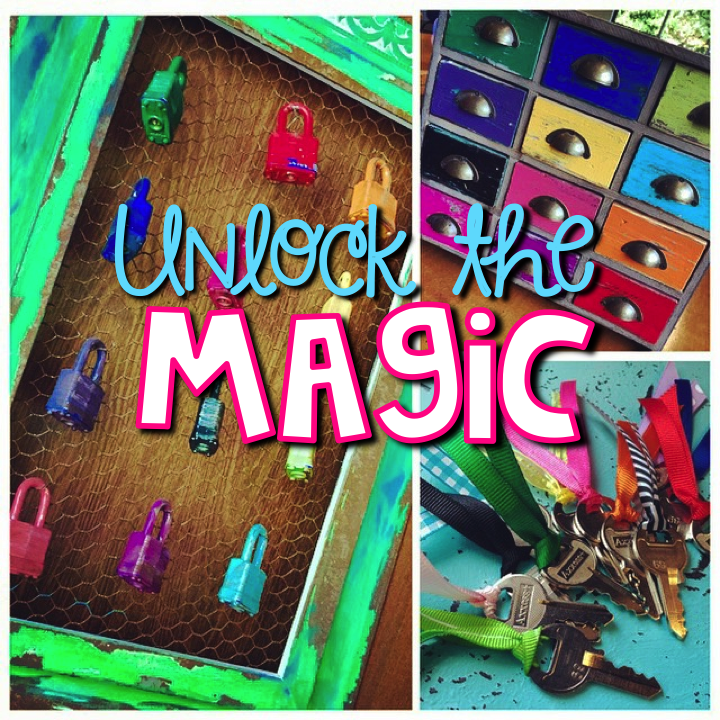
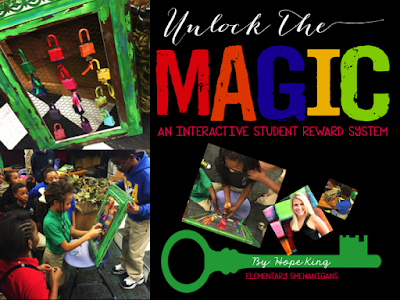
If you read my first Unlock the Magic post (FIND IT HERE), here is a little update and a freebie! Plus you get a little peek at my first Unlock the magic ceremony from this past Friday.
Many of you may have already watched my Unlock the Magic Periscope that I posted several months ago to my blog. I am so excited about this little reward system that I created after years of watching The Price is Right. Here is a quick little video about how the reward system works:
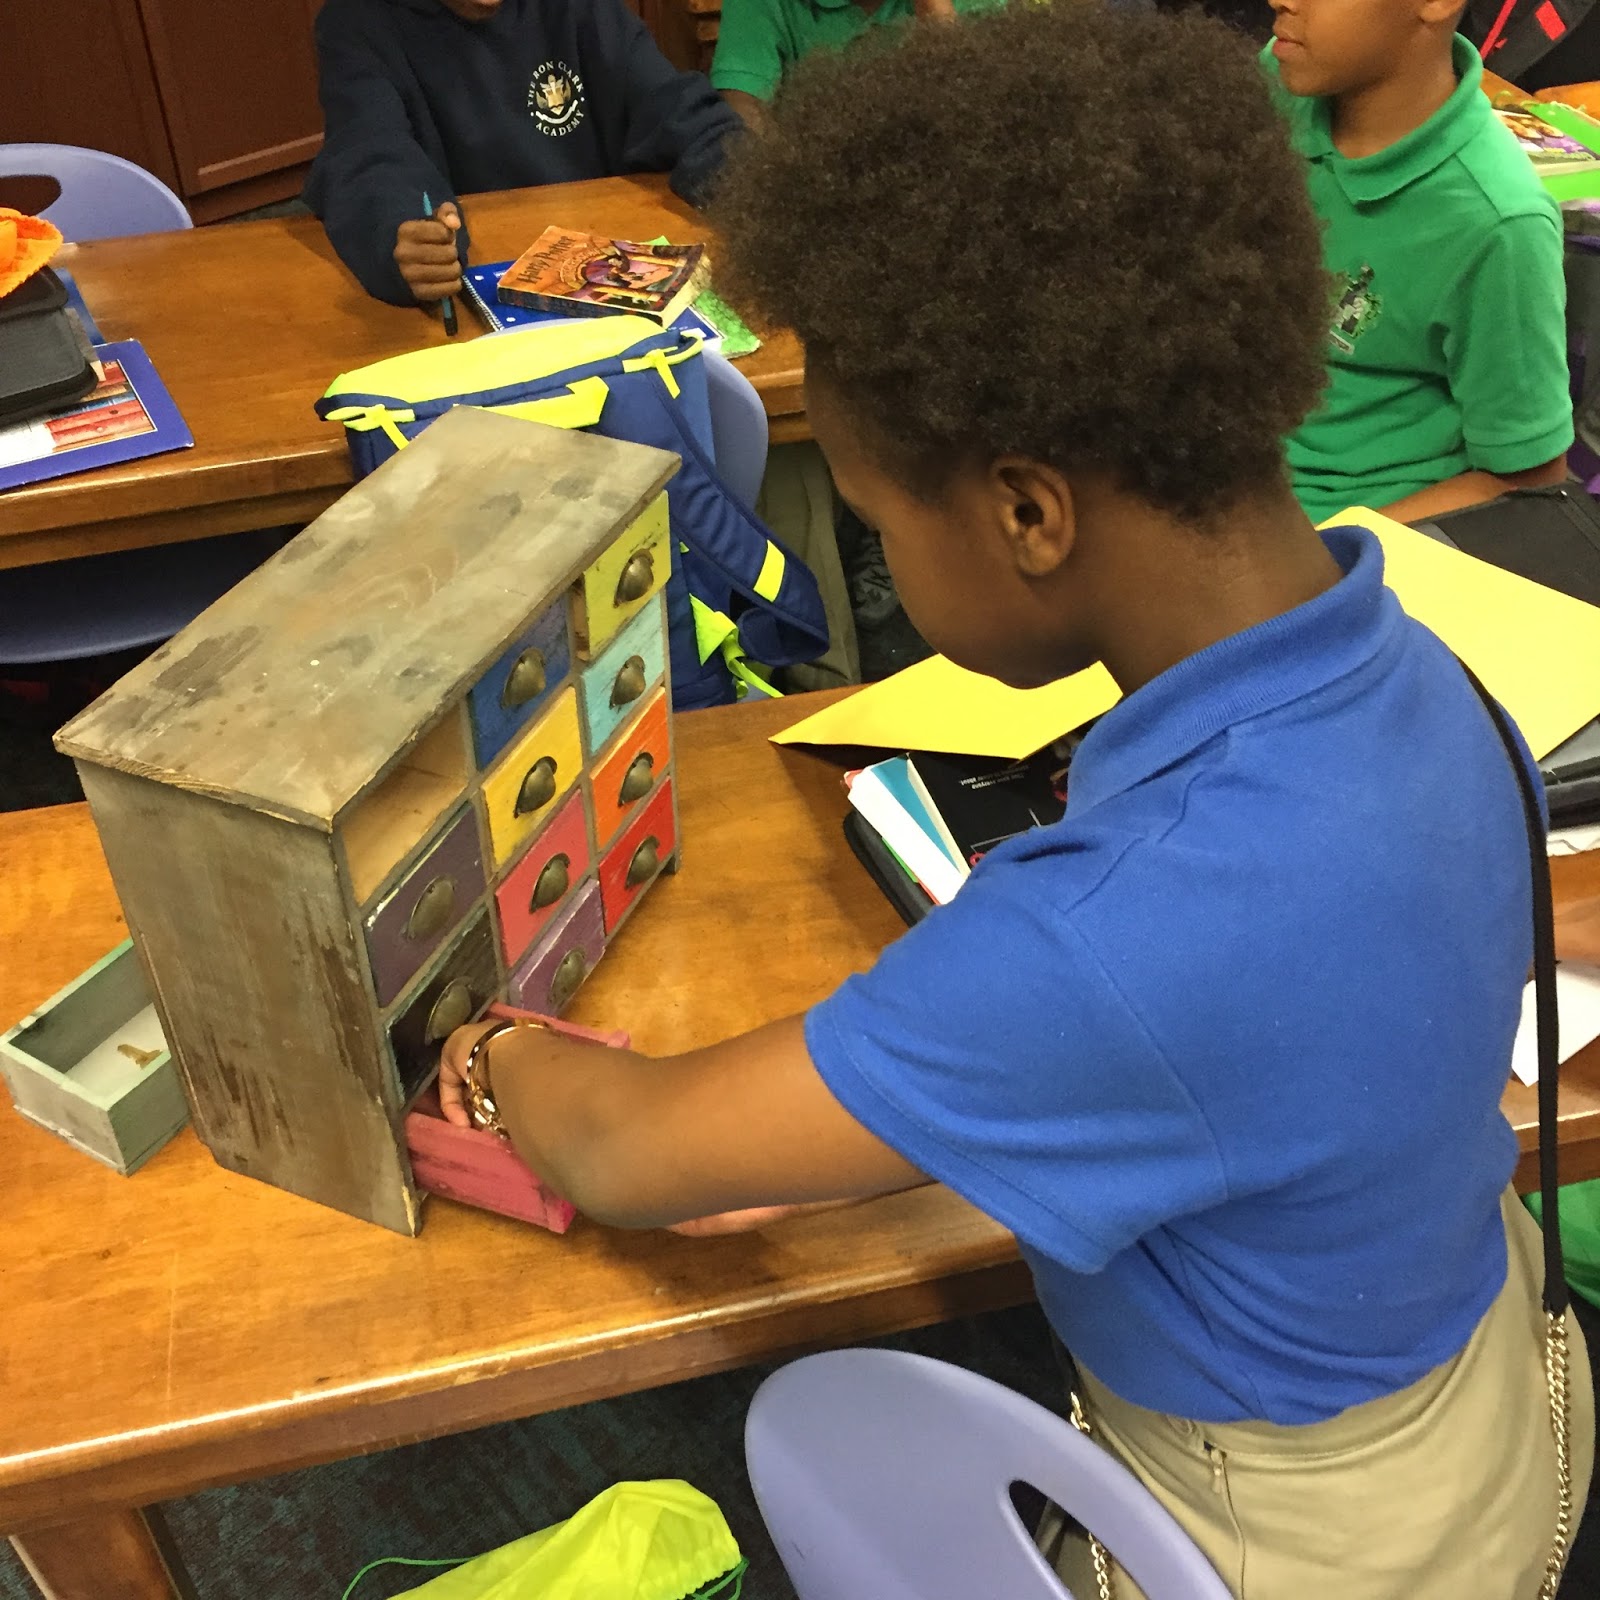
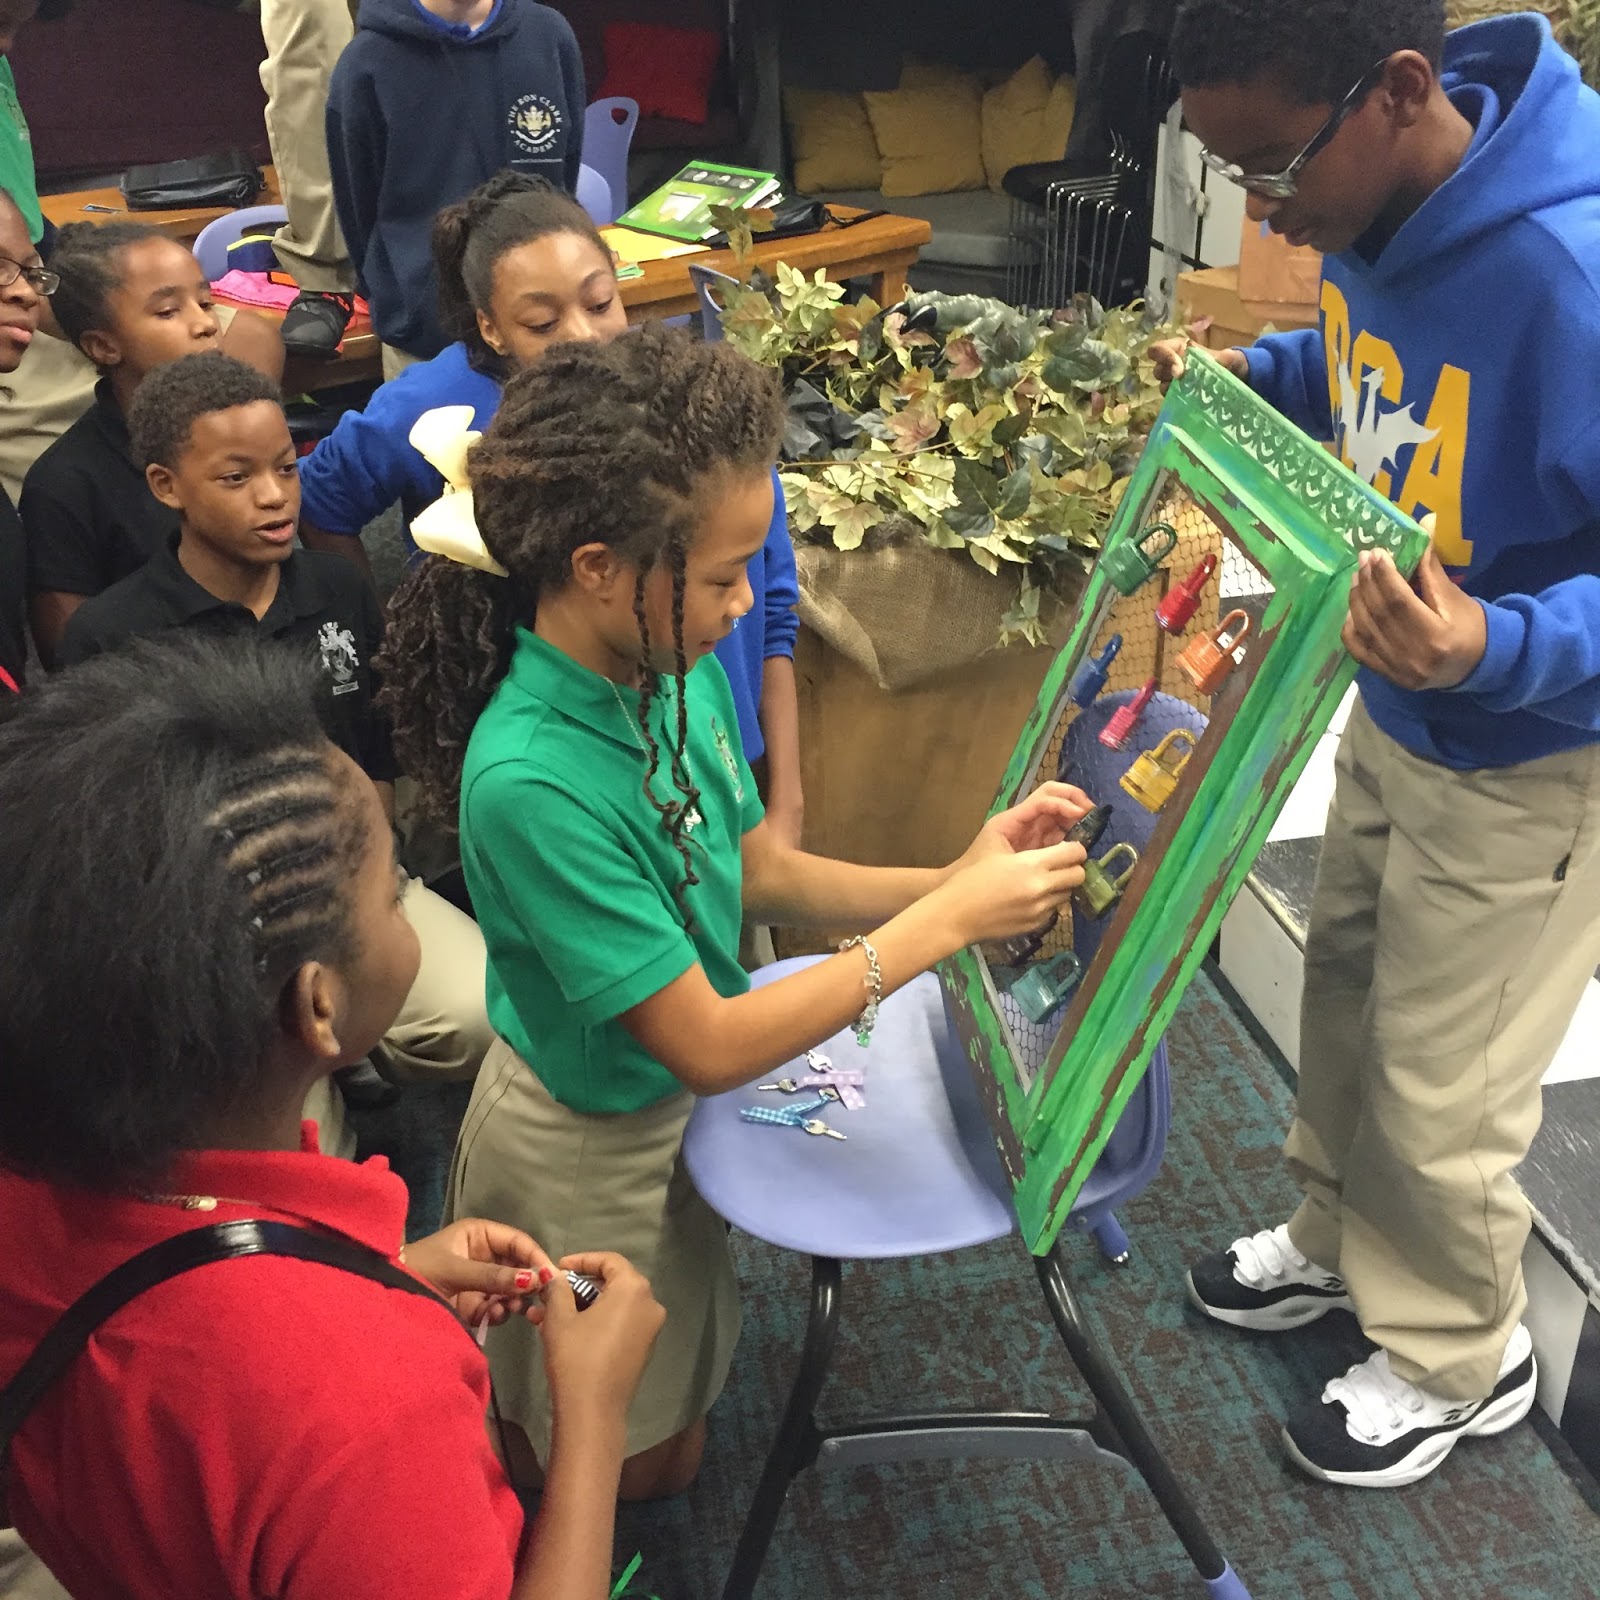
Last Friday, we had our very first Unlock the Magic ceremony for the month of September. The kids worked so hard to earn keys all month long. Here is a look at the celebration going down...
I will have 12 5th and 6th graders joining me on our first reward trip which I will announce on Monday. :)
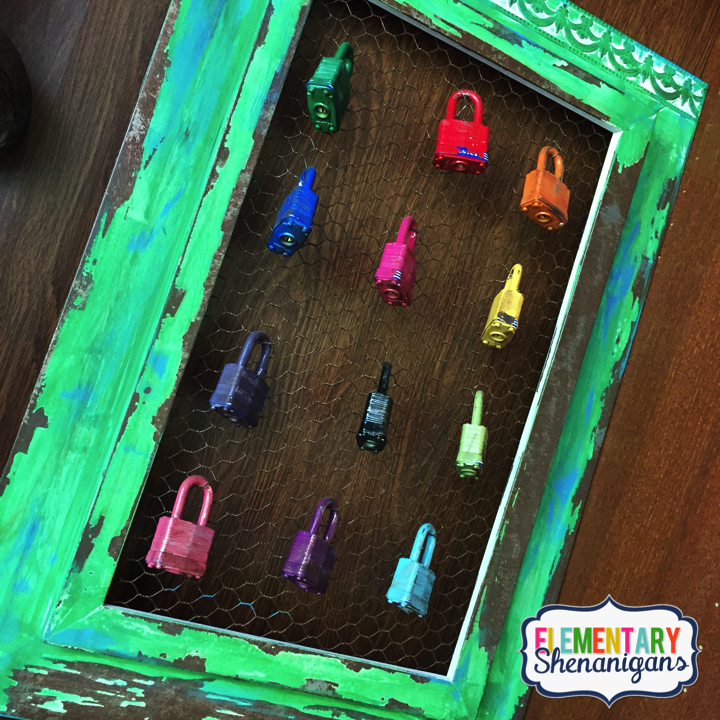
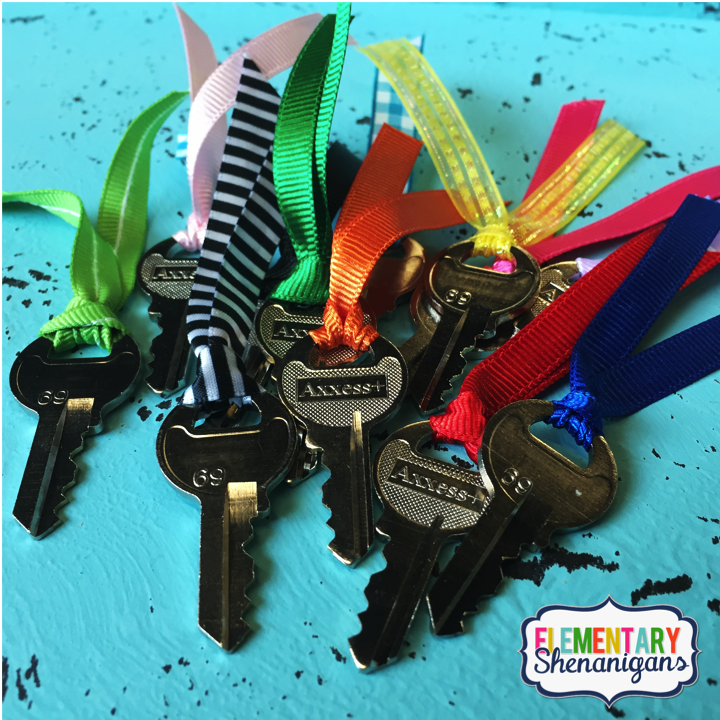
This is super easy to create and use. In short, the kids earn keys {paper keys} throughout the month for different behaviors and achievements. At the end of each month, we have a key ceremony where the students will receive their actual key and have a chance at unlocking their lock. If that lock opens, they get to attend that months reward trip.
In the video, I gave tons of suggestions for how to recreate this project. The keys can be a little tricky...so pay close attention to that part.
And remember...reward trips do not have to be super expensive, but it is a great way to build relationships with your students outside the four walls of your classroom. If you can make it work...I HIGHLY recommend it. Watch the video for some ideas of inexpensive reward trips!
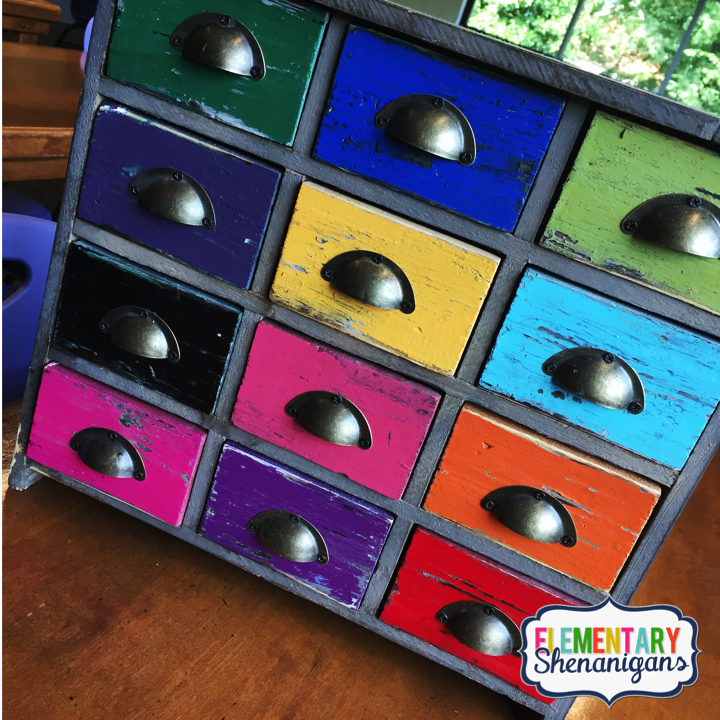
This is where I house all of my keys. It is simply a cute storage container from Hobby Lobby that I painted to match my locks.
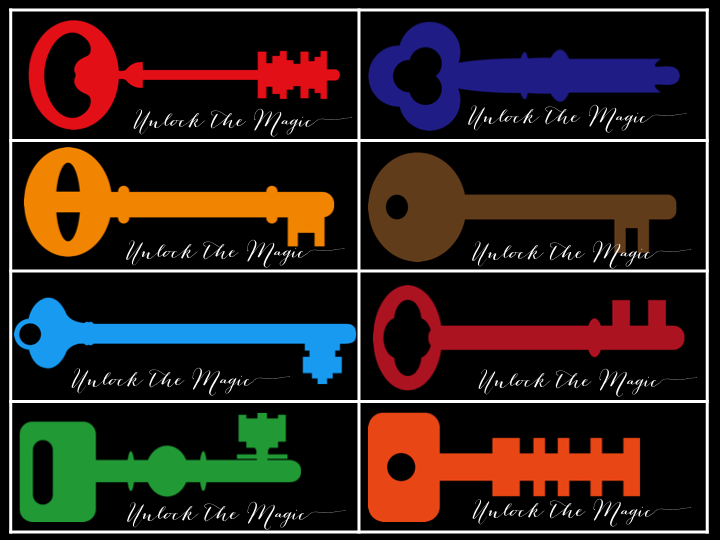
A little key update: I DO NOT give the students an actual key when they earn one in the classroom. I would be replacing keys every single month. Instead, I give them a paper key that they have to redeem at the ceremony for their actual key that could potentially unlock one of our locks. I have created a little freebie that I just uploaded to my TPT shop. It contains all of the keys that you will need. A few suggestions:
a) I print the keys on cardstock paper. I have the students write their name on the back of their key in pen and hang tight until the ceremony.
b) Each month, I print a set with a different colored background. No sneaky business here! Lol! You can download the freebie by clicking on the image below.
That's it y'all! That's really it. How will you unlock the magic in your classroom this year?
I will be back some more over the next few days to share ideas for these two things just in case you missed the periscopes! :)